Topic
This article describes how to perform an instant virtualization on Datto Continuity for Microsoft Azure (DCMA).
Environment
Datto Continuity for Microsoft Azure (DCMA)
Description
The Instant Virtualization recovery method boots a recovery point from the desired protected system as a virtual machine in the Datto Cloud.
Instant Virtualizations take place in the Datto Cloud, not in your Microsoft Azure environment.
You can only perform Instant Virtualizations on recovery points that have replicated to the Datto Cloud.
Procedure
1. From the Recovery Launchpad, click the START INSTANT VIRTUALIZATION button.
 Figure 1: The Recovery Launchpad
2. Choose the system from which to restore, then select the desired recovery point. Check the box for the desired system, then click the date and time from which to restore. The Recovery Launchpad will show available dates in blue. When finished, click the CREATE INSTANT VIRTUALIZATION button.
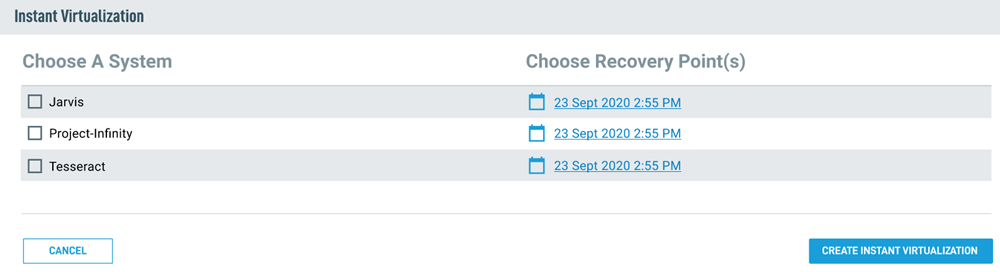 Figure 2: Recovery point selection
3. Select the number of CPU cores, amount of RAM, and the Network to which you are restoring. Click Show Advanced Settings to gain control of the virtualization controller and NIC. When finished, click the CREATE INSTANT VIRTUALIZATION button.
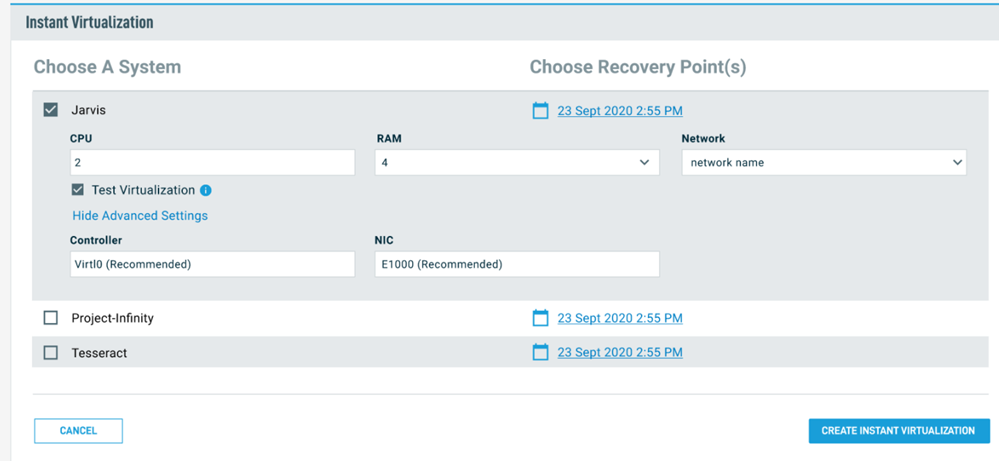 Figure 3: Processor, RAM and network selection
4. On the Cloud SIRIS Recovery Launchpad page, find the Instant Virtualization card, then find the entry for your newly created restore. Click the power icon to power your restore on.

Figure 4: Power the Instant Virtualization on
5. After powering the restore on, you can access it with most VNC clients. Click the external link icon under VNC to connect to the restore.

Figure 5: Connection to the restore
Converting Instant Virtualizations to file restores or image exports
Partners can now convert Instant Virtualizations into file restores or image exports. The image exports provide a method for converting the most recent snapshot of the instant virtualization to a VHD export for subsequent restoration to Azure.
NOTE: The virtualization will be destroyed upon conversion to either a file restore or image export. This action is not reversible.
To convert your Instant Virtualization to a file restore or image export, click the menu icon and select your conversion from the drop-down menu
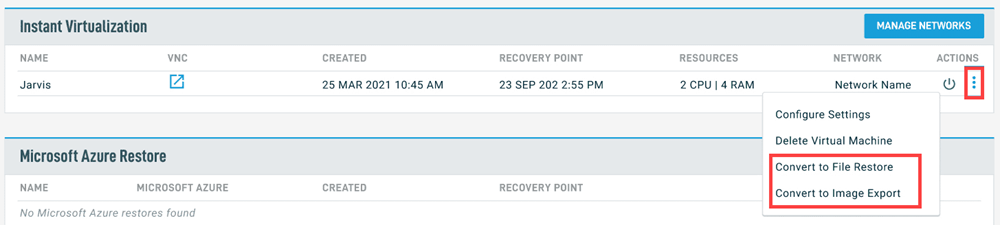
Figure 6: Instant Virtualization conversion options
Editing Instant Virtualization resources
You can power down and edit the Instant Virtualization's assigned resources (such as number of cores and amount of assigned RAM) at any time by clicking the pencil icon on the restore entry.
 Figure 7: Editing restore resources
Destroying the Restore
When you are finished with the Instant Virtualization, power it down and click the trashcan icon to destroy and remove it from the Datto Cloud.

Figure 8: Removing the Instant Virtualization